Saturday, July 4, 2009

The Way To Tweak AWESOME TONE From the Line 6 VETTA! (Part 2)


Getting awesome tone from the Line 6 Vetta isn’t as hard as you think.
A small investment of time is all that’s required. Think of the $$$ you’ve spent on this piece of gear. Why not get the most out of it? Part 1 of this article may have seemed like a lot of info to take in, and that’s because it is. But actually learning your own rig’s tendencies with the Vetta is pretty easy when you actually do it. Line 6 Edit Live Tweaking gets you to a real understanding of your rig’s tendencies within the context of your band/music, and this can be accomplished quickly.


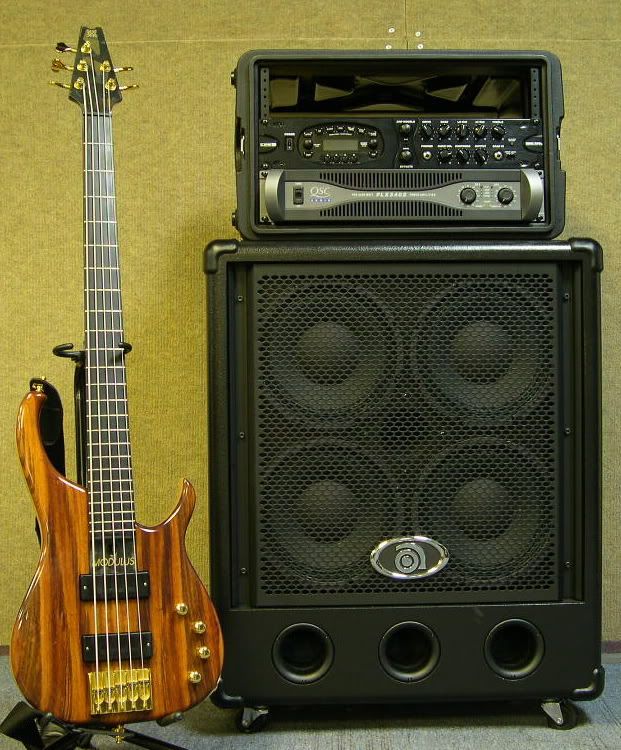
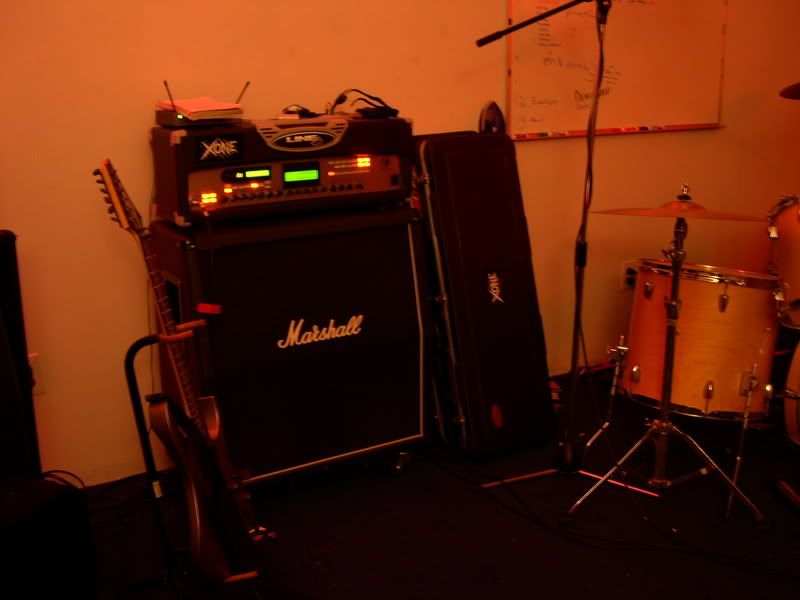
Your exact rig will help you get started. For example, I play an Ibanez RG1570 with D’addario EXL140 strings (Tuned DGCFAD) into a Vetta Head, dual Monster cabled in stereo into a Marshall 1960A 4x12 cabinet with G12T75 speakers. I make only Blended patches, that utilize the Amp 2 slot for the Low, Low-Mid part of the patch with Channel Volume at 100%, and the Amp 1 slot for the Hi-Mid, Hi part of the patch with Channel Volume at around 50-80%. Both amps are panned to Center, and I always use NO CAB sim. The Vetta is in 4x12 mode in Stereo, Presence ON, Loudness OFF, SM-57 AIR Global.

Look at your rig the same way. Are you playing straight into a Vetta Combo or using a separate cab, 1x12, 2x12, 4x12? What kind of characteristics do your speakers/cab have?

I know that at Live volume, my Marshall 4x12 adds a lot of thump/bass, so I tweak all of my patches in the Vetta with a Bass setting of 20% (9 o’clock). This also helps my bassist Ted, because now the Low End can be his domain in the live mix. And my tone is still nice and warm and chunky.

This is an example of how one learns their rig within the context of the Vetta being the tone source. You have to learn your rig the same way.
You have to find this out in the environment that you play in. If you are a LIVE player, then you must learn this playing at Live Volume(LOUD). If you are a BEDROOM player, then you must learn this at BEDROOM Volume (LOW).

BEDROOM patches do not transfer to the LIVE environment,
and Vice-Versa.

In explaining how I set the amp model variables, I want to keep clear that these settings are relative to my exact rig and your settings will probably be different. These settings have been constant for me, ever since I figured them out.

Since I make only Blended patches, I will refer to Amp 1 and Amp 2 settings (Amp 1=Hi-Mids, Highs - Amp 2= Low-Mids, Lows).
I start with Amp 2 before adding Amp 1.
My Settings are basically the same for both Clean and Hi-Gain tones.
(Some amp models require certain variant settings, so saving as default is always good) (Cab Sims are “OFF”)


DRIVE
Amp 1 = 50%
Amp 1 = 50%
Always set this to 50% for BOTH models.
You can tweak from there later, but start with the Nominal Tone Setting, as stated by Line 6 in their Manual. Sometimes after the patch is finished,
I will increase the 50% to 52% on Amp 2, and I’ll get that right amount of tube saturation sound on the patch. Sometimes adding it only to Amp 1 does this. Sometimes setting both to 52% makes the magic happen. Sometimes it’s 60%, 70%, 83% on Amp2…
You have to figure out what values favor YOUR RIG.

Note: Gain Staging
(Essentially, too much of 2 DRIVE/GAIN/distortion sources mixing together = NOISE ☹ bad).


BASS
Amp 1 = 20%
Amp 2 = 20%
I mentioned before that I set both Bass levels to 20%, due to my Marshall cab adding Bass at LIVE volume. That is true on most patches. Sometimes I set Amp 2 to 23% for a bit more chunk/thickness. Some models require a starting Bass setting of 50% to find their thickness, like the Line 6 Big Bottom, Marshall JMP-1, or Soldano X88R models.
Most of the time it’s 20% for me.
You’ll have to see what works for you.
For example, my friend Adam’s Vetta is 36% Bass Level.
He uses a Schecter Guitar>Vetta II HD>Line6 4x12 V30s.
You can see the variance.


MID
Amp 1 = 50%
Amp 2 = 16-20% - 18% on most of my patches.
While you would probably want to keep the Mids low with a Tube Amp,
that will not work with a Digital Amp like the Vetta.
You’ll need to push the Mids to cut thru in a Band Mix for LIVE volume.
That’s why I always have Amp 1 = 50%. It makes sure that I cut thru.
(You can set the Mids any way you want for BEDROOM volume,
Cause you’ll always cut thru by yourself ☺ )


TREBLE
Amp 1 = 82%
Amp 2 = 70%
These settings are very standard for my patches. They don’t change at all,
except for on a few Clean amp models where Amp2=50% because of the Highs. Otherwise, these are set in stone for MY RIG.

PRESENCE
Amp 1 = 83%
Amp 1 = 83%
Another “Set In Stone” Setting for My Rig. Because XONE is tuned to DGCFAD, I need a lot of Presence to be in front in the mix. This Presence setting puts me there, without becoming “shrill”.
(I also have the Global Presence Boost “On”).

VOLUME
Amp 1 = 30-83% (50% is the standard setting that always works)
Amp 2 = 100%
I always set Amp 2=100% because I believe that the models sound best when pushed to “11” here. Amp 2 carries most of the patch.
I usually set Amp 1 to 50% to start tweaking it into the tone.
Many times it stays at 50%. Sometimes 83% works really good,
Sometimes 30%, 60%, 70%. Sometimes 52%. Sometimes 44%.
Here’s where the Blending really takes place in Blended Patches.
It’s a lot of fun HEARING a new tone come together from two different amp models.

Note: Checking your Gain Staging at the end can sometimes add that last little bit of Magic that a tone is missing. You might not even know it’s there, until you type it in, try it, and realize, it sounds right!


I want to reiterate, that using LINE 6 EDIT to TYPE IN these exact values,
rather than turning knobs, allows you to get to the finite, best tone out of the Vetta. You can LITERALLY HEAR the difference in quality between say, 50% and 52% or 83% and 88%, in any of the Vetta’s variables, amps, effects. You cannot make these changes with the faceplate knobs. If you want AWESOME VETTA TONE, you gotta tweak it with Line 6 Edit…

I really love the Line 6 Vetta. And I think that Line 6 has really delivered an awesome Multi-Variable Tone Machine to those who are looking for such a piece of gear. It’s not for everybody, but it’s definitely for me.
I wanted something similar to John Petrucci’s Rig, but I have neither the Money, nor the Time and the ability to Cart it around, nor even the Chops for such a HUMONGOUS rig ☺. I purchased my Vetta in 2003, and it has provided everything I wanted originally and MORE over the last 6 years. I’m having so much fun with it. I want you to have the same fun with your Vetta.
And I’m not going to sell it to you for money like some would.
I’m sharing it for FREE. (Like our CD)
All you have to do it test this method out thoroughly,
and try Line 6 Edit Live Tweaking with your Vetta!

No Factory Patches Allowed!!

Stay Tuned for Part 3…


UPDATE: Here's Part 3!!!!

Saturday, June 27, 2009

The Way To Tweak AWESOME TONE From the Line 6 VETTA! (Part 1)


There is a way to get AWESOME TONE from the Line 6 Vetta.
It doesn’t involve twisting knobs, or hours upon hours of tweaking.
It involves the knowledge of one’s complete Rig within the context of the Vetta, and tweaking to that Rig’s strengths by a single method.
It’s what I call “Line 6 Edit Live Tweaking”.
And it works! If you’re not getting everything you want out of your Vetta,
then read this and try Line 6 Edit Live Tweaking for yourself…


I’ve owned my Vetta HD (now on ver2.50) for almost 6 years.
I’ve taken the tweaking of it very seriously since the beginning.
I wanted really awesome, Pro-sounding LIVE tone at an affordable price,
in a convenient, singular, easy to set up package with many controllable variables. The Vetta HD has delivered exactly that! But it DID NOT come immediately. It has been an ongoing process to completely compartmentalize all of the amazing processes that this amp can do. In lieu of Line 6’s recent Announcement that Vetta will receive NO MORE VETTA UPGRADES, I’m posting my findings in hope of helping Vetta Users everywhere get brilliant tone from their all-digital, complex, musical gadget, or Vetta’s for short. I do not personally believe that there’s any other way to get AWESOME TONE from the VETTA, other than the method I’m posting here.

I realized quickly that the factory patches that came with the Vetta were useless for my rig
(Ibanez RG1570>Vetta HD>Marshall 1960A 4x12).
I needed to tweak my own original patches for my specific rig. For the first 2 years, I tweaked my Vetta with the Vetta Face Tone Knobs and Edit Window. After 2 years tweaking the Vetta, I was pretty satisfied with my tone. I thought I was getting everything I could out of the amp.
I WAS WRONG!

In my third year of Vetta usage, my Bassist Ted gave me an old laptop computer for free. It quickly became a computer whose only role in the world was to tweak my Line 6 gear (Vetta HD, Flextone III). I got an M-Audio Uno USB midi interface and two USB extension cables, and began tweaking my Vetta after rehearsal at LIVE volume (95-112db) using the Line 6 Edit graphic editor. With the Vetta now 17 feet away from me, I could really hear a particular patch’s tone, rather than standing directly in front of the amp when making adjustments with knobs on the Vetta faceplate. As I made an adjustment to a particular value, such as DRIVE,
using my mouse after striking a note or chord, I could really hear the attenuation of the Amp Model’s pre-amp gain. Line 6 Edit’s excellent graphical interface allowed me to adjust every single patch variable easily from 17 feet away from my VETTA, in REALTIME!

Fast forward to 3.5 years of twice weekly, post-rehearsal sessions of purely tweaking my Vetta, with Line 6 Edit, from 17 feet away, at live volume in a rehearsal room when making new tones for new songs, or just for the fun of experimentation. The laptop stays at the rehearsal room for just this purpose. I currently tweak my Vetta while looking out a large window at the beautifully lit, and always working Los Angeles Harbor. I will sit and tweak patches until 2am, testing new theories and ideas of combinations.

I’ve intentionally deleted whole libraries of created for fun patches to start the whole process over again. I really know which Amp Models I like in the Vetta. The Engl Powerball, Diezel Herbert, 5150 II, Line 6 Chunk Chunk, Lunatic, Treadplate, Big Bottom are my favorite for Hi-Gain Tones.
I make only Blended patches, that utilize the Amp 2 slot for the Low, Low-Mid part of the patch with Channel Volume at 100%, and the Amp 1 slot for the Hi-Mid, Hi part of the patch with Channel Volume at around 50-80%. Both amps are panned to Center, and I always use NO CAB sim. The Vetta is in 4x12 mode in Stereo, Presence ON, Loudness OFF, SM-57 AIR Global. All these settings favor my particular Rig, with my EQ sitting within my Band’s Entire Mix for Live use.

Here’s the POINT of this whole thing.
And we are talking LIVE/GIG TONE here.

I’ve found while tweaking in Line 6 Edit,
that there can be HUGE differences between having, say, the Amp Model’s DRIVE set at 48%, 50%, 52%, 58%, 66%, 83%, 98%, etc… (Line 6 Edit uses percentage for all parameter variables). The knobs on the Vetta faceplate do not allow you to make such FINE adjustments. And these FINE ADJUSTMENTS are essential to creating Excellent Tone in the Vetta, for your Rig. These fine adjustments are not dialed in with the mouse. They are TYPED in exactly. Sometimes, those adjustments get made when you are dialing in the amp models at the start of creating a patch. But often, they come after you’ve customized every single variable within the patch and are at your final SAVE. It’s the last “Coup De Gras” to the TONE, and makes it just come alive! Your EARS will HEAR it!

(To TYPE in values, just double click on the number value above the knob/variable)

I’ve not only tested this theory on my own Vetta and Flextone III+,
but I’ve also helped many of my friends with POD XT Live, HD147, Bass POD XT Pro patches with this method. I’m even tweaking a POD X3 Live for our Violinist Shawna. There is a common thread for killer tone in all those Line 6 products and it is the AVAILABLE FINITE VARIABLE CONTROL of the adjustable parameters inside of Line 6 products. Forget the Knobs. In fact, put them in some crazy setup,
like all to “11”!!! They are irrelevant.
(The only faceplate knobs on the Vetta I might ever use are the Global Rev, Lo, Hi to compensate for a new live environment)

I firmly believe IMHO that if you are NOT Tweaking your Vetta, with Line 6 Edit, at your LIVE Volume, from a minimum of 10 feet away, you are not getting the most out of the Vetta.

I firmly believe IMHO that if you owned and later sold the Vetta without ever investing at least 6 MONTHS of pure “Line 6 Edit Live Tweaking” time, that you did NOT experience what this amp can really do.

If I did not intend to tweak patches in the Vetta this way,
I would play something else. Engl, Diezel, Krank…
See my Article on Vetta’s Subjectivity.

That is NOT to say that tweaking in Line 6 Edit is time consuming. In fact, it’s the opposite! Once you really learn YOUR RIG’S tendencies (plus the way you sit in your band’s mix with the Vetta, etc…)
you will dial in new patches with amazing quickness.
(But everything starts somewhere with any piece of gear)

For example, in January 09, I routed a Yamaha electric VIOLIN through my Flextone III+, into a Marshall 1960A 4x12 for a live rehearsal. I very quickly dialed in a tone for our violinist Shawna, using the Flex III’s JC-120 model and typing in values in even numbers (Edit/my rig likes even numbers for the most part), all the while, using our EARS to decide when we had the tone. We gave her some Digital Delay and Rich Chamber Reverb, typing in the values and testing quickly, and WHAM! We were rehearsing, not tweaking away forever, getting nowhere, like I hear from some who use the knobs. And she was cutting through as well!
(She now uses the POD X3 Live)

If you use Line 6 Edit in this fashion regularly, you’ll get to where the number values mean more to you than say, tapping the Tap Tempo button for Delay Time. It is NOT math, either. I will NOT do math. I’m all History/English/Art in the brain. Yet, Line 6 Edit is so easy and understandable for me, that it has become amazingly familiar. I can fully extrapolate my favorite effects settings in my head now before I even type them in. That’s 3.5 years of bi-weekly Line 6 Edit Live Tweaking only. Time and Regularity make it a simple process in no time.

Even the tube snobs I know, can’t deny the strength of my Vetta’s LIVE Tone. My Vetta’s tones have converted a bunch of my friends and fellow musicians to Line 6 products. In a blind listening test against the real amp, I’ve had people pick the Vetta as the better sounding. I attribute this to the use of line 6 Edit. Without Line 6 Edit, I couldn’t dial in these tones.


I still can NOT seem to fully Record my LIVE tone, and have it represent what it sounds like Live. But in the LIVE environment, I know I’m firing on all cylinders in regards to the Vetta. My tone is full, rich and totally 3-D live. Try Line 6 Edit Live Tweaking with your Vetta. You won’t be sorry…Cause this is a great amp, and it can be GREAT for you!

I’ve posted 4 of my Vetta patches at Line 6’s CustomTone.com
under XONE. They were tweaked for my rig, so if you don’t play an
Ibanez RG1570>Vetta HD>Marshall 1960A 4x12
then you’ll have to tweak those patches to your own rig’s tendencies,
in which case, you ought to just start from scratch and make your own custom patches that are tweaked to YOUR RIG and customize EVERY variable to it. Now Go For It!!

Stay Tuned for Part 2

Saturday, June 20, 2009

The Vetta Subjectivity XONE


I love my Line 6 Vetta Guitar Amp! It allows me to have so many different tones for XONE’s original songs. After 6 years of owning my Vetta HD (ver2.50), one of the most important aspects of understanding how to get great tone from any Vetta, is understanding just how subjective the Vetta really is. Whatever you plug into the Vetta is crucial to the signal chain, and no 2 guitar models sound alike thru it. I recently found out just how true this is.

For Christmas, I decided to have my identical Ibanez RG1570 Guitars intonated and setup again, since it had been about 3 years since my last. I took my guitars to a guy with a great reputation. What a mistake!! Unfortunately, he did not fully understand Ibanez guitars’ Necks and Trems, and the guitars were returned to me completely out of whack. $200 dollars and 5 months later, I’ve finally gotten both guitars back to where they were before.

The subjectivity of the guitars’ setup directly affected all of the original patches I had tweaked for XONE’s original songs. When I first got the guitars back, all of my patches sounded horrible. Besides having two other pros setup the guitars, I had to work on those 2 Ibanez guitars until I could get them back to where they were before they were set up incorrectly. My “classic” original XONE Vetta patches helped me do this. I continued to tweak away at the guitars, using my patches as the measuring stick.

During the process, the Vetta’s tone went from super crappy fizzy back to full-bodied warm and expressive as I altered the bridge pickup, pickup pole pieces, and trem height. I heard so many variations of my tried and true patches as I tweaked along, that I really heard the subjectivity of the Vetta in its entirety. Finally returning the guitars to their previous setup and hearing those tones that I loved so much again, was such a relief!!
It was 5 months of Vetta HELL!! Thank God, I’m back to getting awesome tone out of an amp I love!

It really matters what you plug into the Vetta, and how that guitar is setup. If the pickups are too close to the strings, the Vetta’s amp models will sound fizzy. If the pickups are too far away from the strings, the Vetta’s amp models will sound too thin. It is a finite area that sounds brilliant thru the Vetta. Forget what you think the pickup height should be, use your ears to determine how your pickups best utilize the amp models in the Vetta. Otherwise, you haven’t really heard how much body those amp models have…


Tuesday, June 9, 2009

The Long Distance XONE Part 2


Well, it has been 1.5 years since our Bassist, Ted, moved away from Southern California. In that time, we have kept our songs tight, thru our use of Click Track Maps in Pro Tools and Sonar. Ted’s been coming down for rehearsal every 2 months since he left, and we have used the method I mentioned in Part 1 of this blog to keep the band intact. We released our CD The 4th Dimension, and we are recording our next. Logistically, we’re doing all of this in two different places, but it is working GREAT!! XONE is alive and well!

Since the separated recording is going excellently, we decided to play a Live Show in San Pedro, Ca this Summer 2009. We’ve been rehearsing separately to Click Track Maps, with Ted’s Bass track accompanying Will and Jason, and Will’s Guitar & Vocals and Jason’s drums accompanying Ted. We’re getting together again in June to rehearse for this show.

We’re really excited to play live again and we’re featuring songs from both The 4th Dimension and our upcoming CD ELEMENTS!
Here’s a video of us rehearsing in January!

Friday, June 5, 2009

HERO – XONE Rehearsal Video


Since we’re rehearsing for a Summer 2009 show, we shot some video of our January 2009 rehearsal. Here’s a video of the second half of our song HERO, featured on our upcoming 2009 XONE album ELEMENTS! Let us know what you think!

We shot this video while playing at Don’s Lounge and it’s a great example of what it’s like to play together again, after practicing to a click track in two different places. The video also features the first time we all played with the Roland TD-6 V-Drums Virtual Drum Kit. We’ll be using the V-Drums when we play this Summer 2009!

Watch the HERO Video at YouTube
(don’t forget to click HQ for High Quality)


Sunday, May 31, 2009

The Virtual Drum Kit (V-Kit) XONE


We’ve been rehearsing for a Summer 2009 local San Pedro live show and we’re excited about showing off some new additions to XONE, one of which is Jason’s new Roland TD-6 V-Kit Virtual Drum Kit. Though, we were all skeptical at first that the V-Kit would sound “fake”, ultimately, we were all blown away by its amazing ability to not only sound natural but also carry the low end! The V-Kit Rules!!

With the use of Pro Tools and the fact that each XONE song has its own Click Track Map, Will and Jason can practice in San Pedro, and Ted can practice in Rocklin to the same song. When we get together every 2 months for weekend rehearsals, we sound like we’ve been practicing twice a week in the same room. All of this for a show we will be playing the Summer 2009!

And for the first time, we will be playing with the Roland V-Kit! It sounds better than the acoustic kit, and Jason’s Yamaha kit sounds great! The V-Kit has so many excellent simulated full drum kits, that time is needed to investigate its instruments. Jason has definitely put this V-Kit through its paces, as we’ve been rehearsing with it exclusively since January! We love how hard it hits and how well it cuts thru. Also, it has helped to lower our overall live volume level to a much more comfortable listening level for our fans ears.

Are you skeptical? We were at first too! Come out and see us this Summer 2009, and see what you think of the new Roland V-Kit. In the meantime, here’s a video clip of the second half of our song HERO from our January XONE rehearsal together. Let us know what you think!

Thursday, January 15, 2009

XONE - Bringing Progressive Metal To The Masses!


XONE (pronounced zône) is a modern metal band, founded by Will Austin in 2001, integrating elements of progressive rock, driven by story-oriented lyrics, expressed with a depth of passion, and delivering an eclectic but captivating sound that cuts across all musical borders. The music takes you into a XONE…

Connecting with the listener is my goal. Anyone who feels my music is important to me!

Fans say XONE's influences, which range from Rush, Iron Maiden, Metallica, Pink Floyd, Evergrey, White Zombie, Van Halen, Tool, Dream Theater, Symphony X, Peter Gabriel, The Police, Godsmack, U-2, and more, can be heard in many different aspects of our music. The lyrical styles range from the re-telling of historical events, exploring the dimensions of both inner and outer space, to everyday relationship encounters, which touch a nerve that we can all relate to...

Give XONE a listen, and let me know what you think!


Homepage
http://www.xonelive.com

XONE Album: The Emperor's Dream
http://www.amazon.com/Emperors-Dream-XONE/dp/B00T6GY8OI/ref=sr_1_1?s=dmusic&ie=UTF8&qid=1424478507&sr=1-1&keywords=XONE+the+emperor%27s+dream


XONE at Facebook
https://www.facebook.com/pages/XONE


Monday, January 12, 2009

The Drum Mic XONE 2


With our latest XONE album, The 4th Dimension, finally released, we are currently recording our next CD in our San Pedro Studio at KOOS Rehearsal. The Drum Mic setup has evolved a bit from our earlier blog on the subject. We employ a 10 mic setup on Jason’s Kit, and we are getting the best drum tracks we’ve ever recorded!

Jason still uses his excellent set of BeyerDynamic Opus Drum mics to capture the full sound of his Blond Maple Yamaha kit with Gibraltar Rack. We have singular mic coverage of the Kick, Snare, Left Overall, Right Overall, 12" Tom, 14" Tom, 18" Floor Tom, Ride Cymbal. The Hi-Hat, Cowbell, and Splash Cymbal get covered by a single Opus mic. A single MXL Condenser mic is set directly in front of the kit to capture the Room. 10 Channels of great mics capturing the sound of his kit, going into a Presonus Digimax FS into Pro Tools Digi 002 Rack in 24 bit.

The tracks are then transferred to an HP running Sonar 7 PE, where I add C4 Compression to the Kick and Snare, and add EQ to every channel. The kit is panned the same as it stands in the room (audience View), with certain Tom parts doubled in stereo. I add Reverb to the Snare, Overalls, Hi-Hat, Ride, and Toms. Listening now, I can say that the drums on our next XONE CD are going to sound way better than anything we’ve ever had before, thanks to good mics, correct placement, and quality DAW/Plug-Ins!